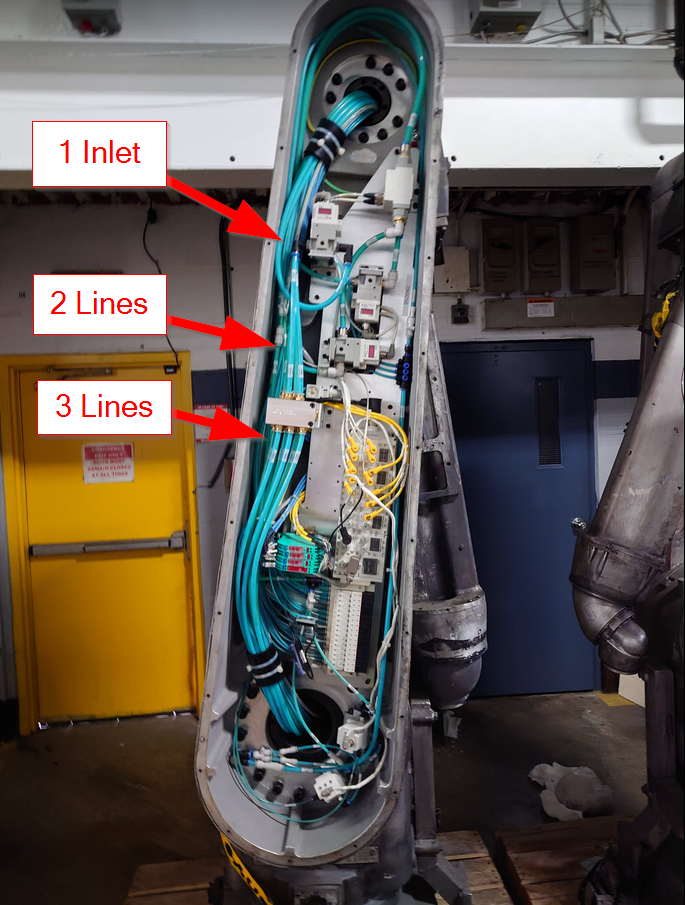
For an upcoming robot install, I was reviewing the process equipment in the paint robot arm. I found quite a “head scratcher” with the compressed air lines. I traced everything through and found that 3 compressed air lines are merged into 2 and then both the lines come into 1 inlet. I can’t understand why this wouldn’t have been designed to be 1 larger compressed air line?? It would be cheaper, reduce the need for adapters and clear up space in an already busy process arm.
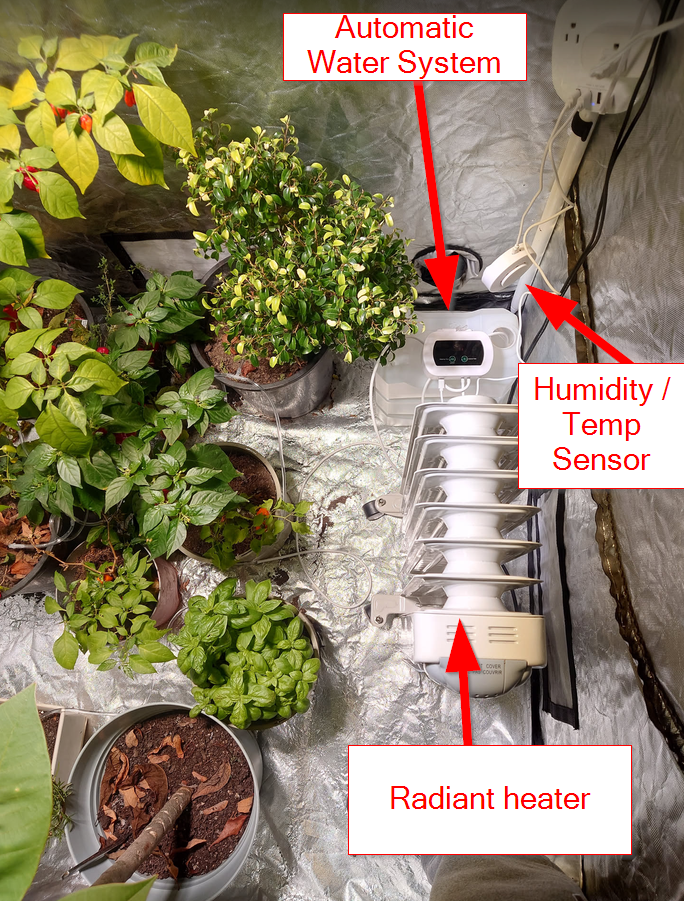
For this winter I setup a automated grow tent to finish off my peppers and keeping my ficus/rosemary healthy. System was fully automated including watering and I went with a radiant heater to manage temperature (I find this much safer than trying to use a space heater). This let me harvest peppers deep into winter when there was snow on the ground. I think this system is great for extending the growing season.
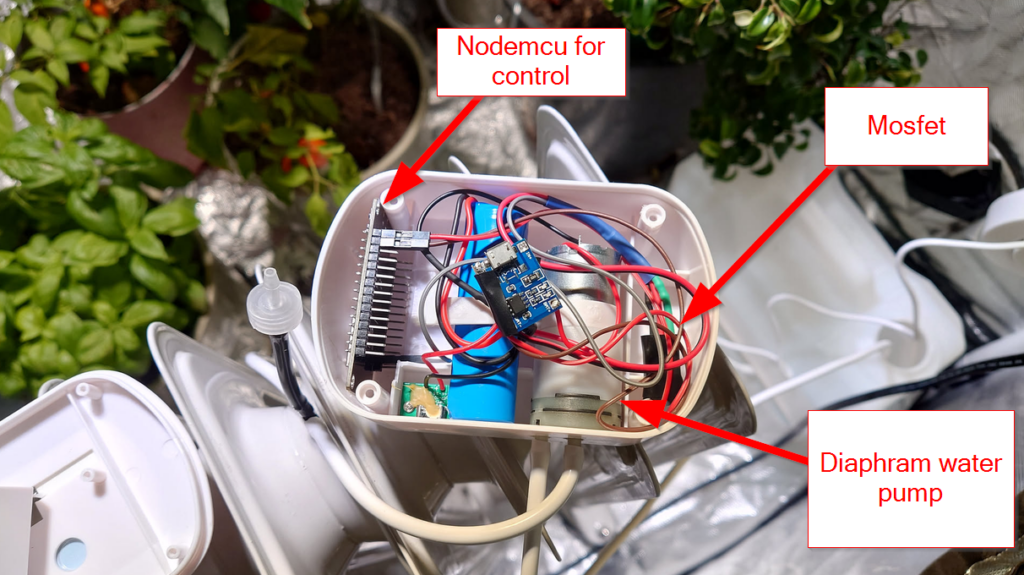
I setup a watering system for my grow tent over the winter. I modified an cheap watering system with a nodemcu for a controller and a simple mosfet to run the pump. I tied into the existing system so I can use the battery. Overall it was a relatively simple modification and was able to set it up in esphome to run at 7am in the morning each day.
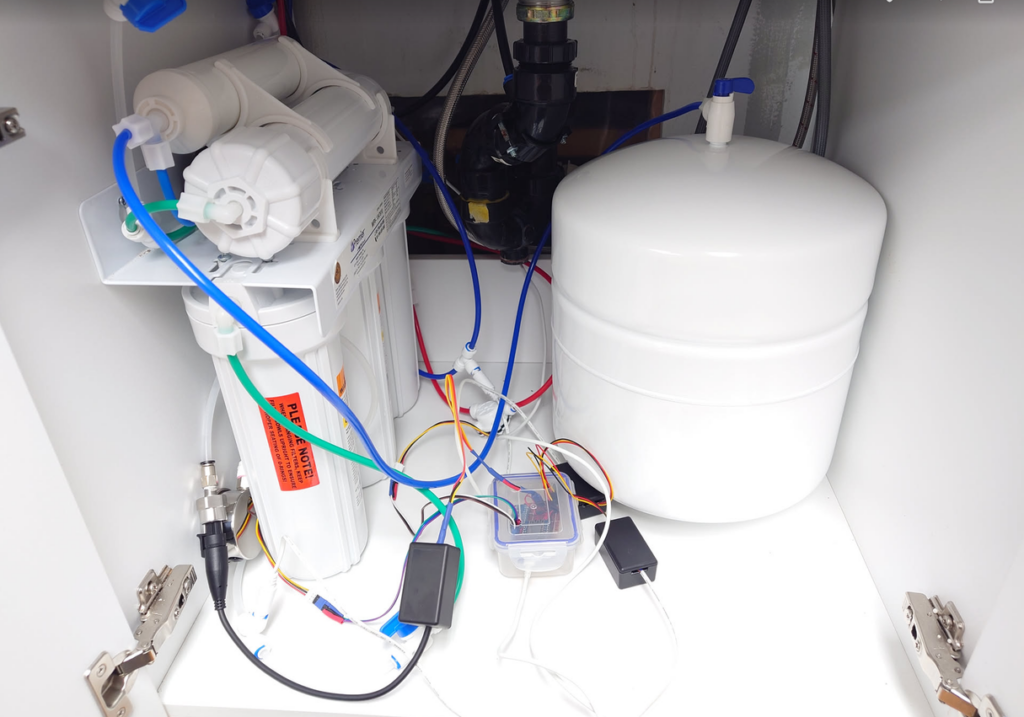
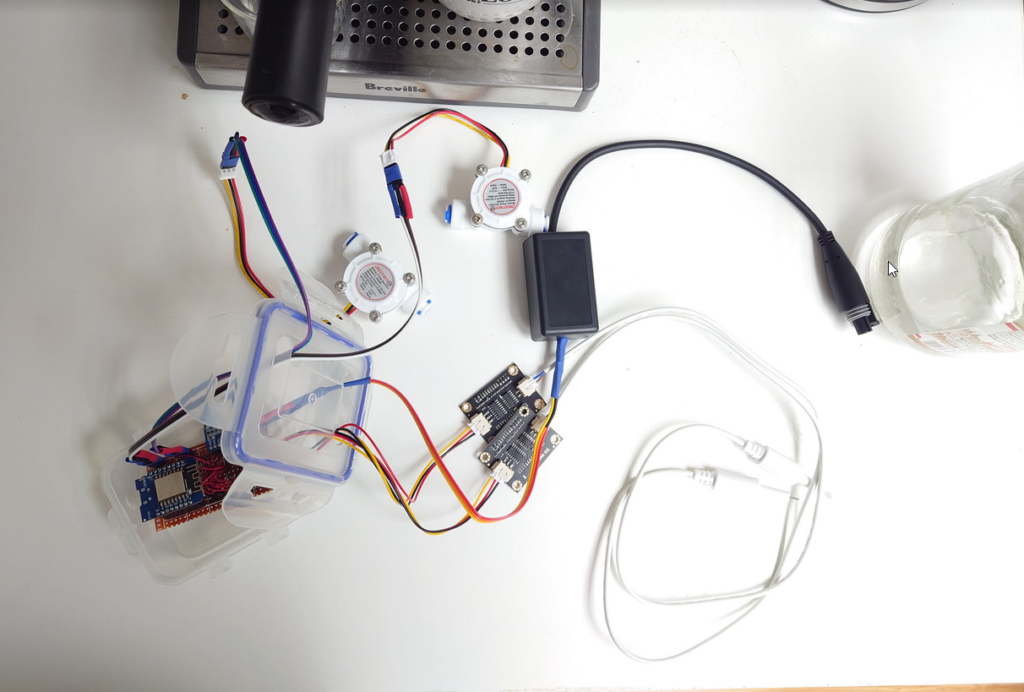
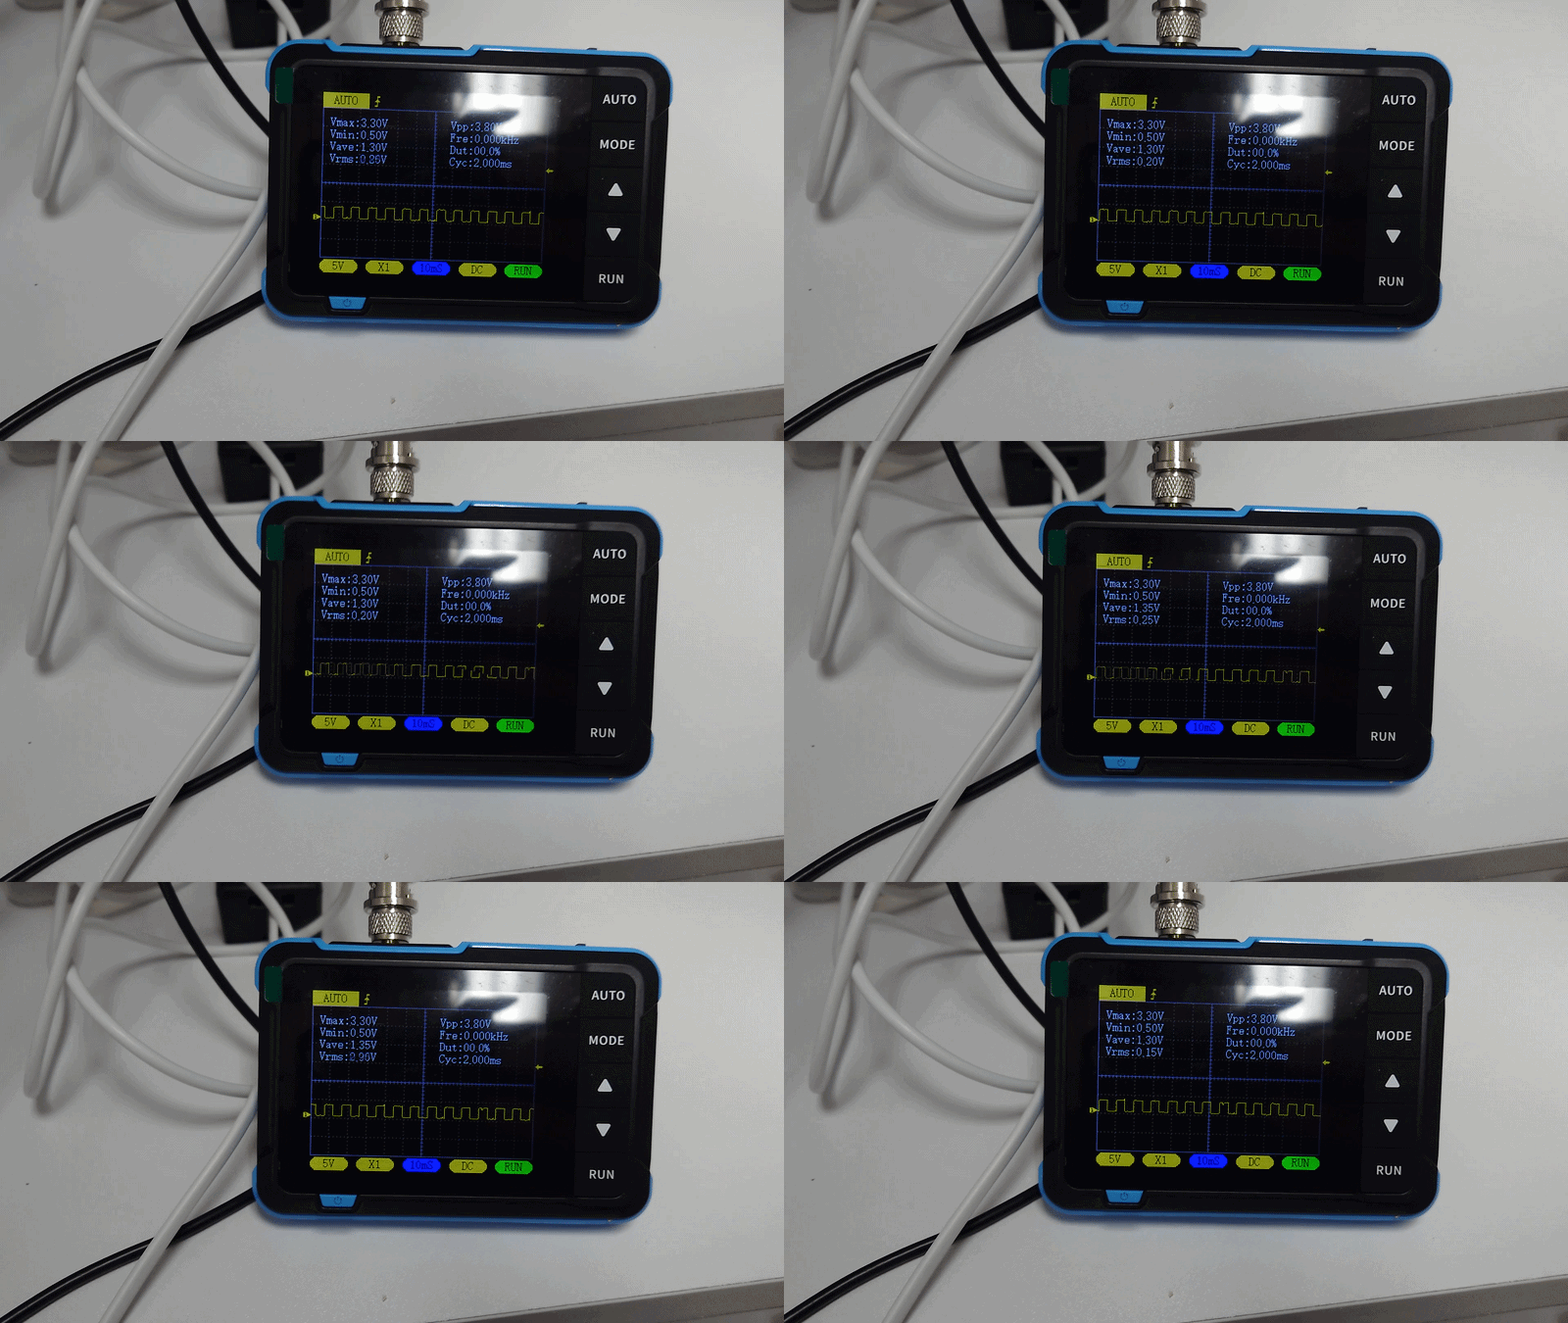
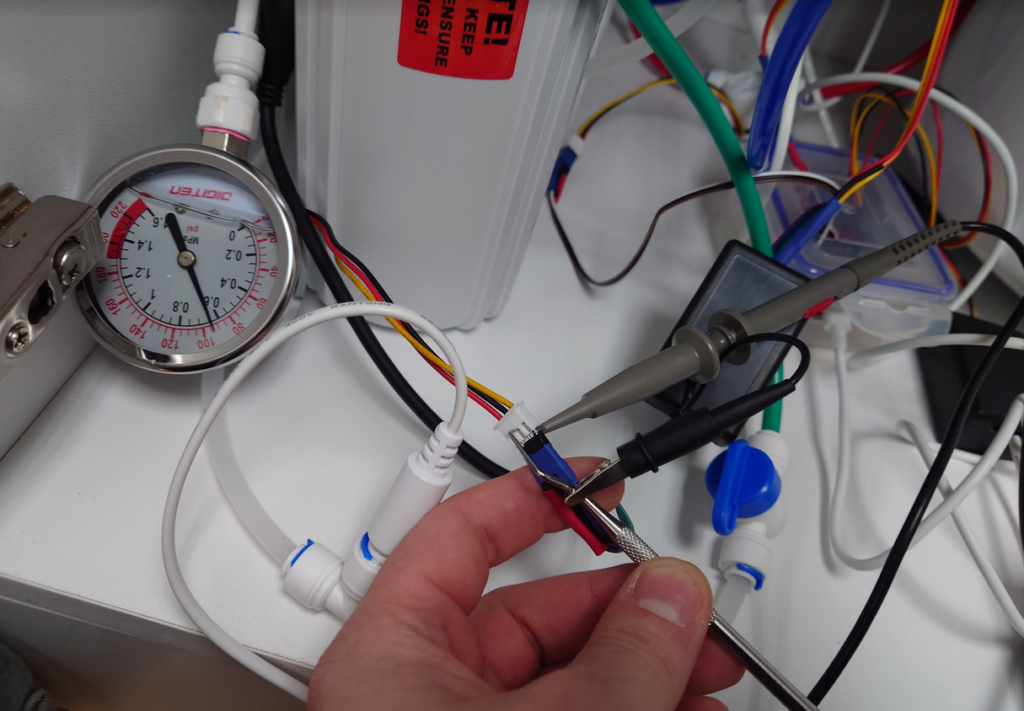
I finally setup a monitoring system for my reverse osmosis system. I have 1 pressure sensor to track mainline water pressure, 2 flow meters to track usage and efficiency and 2 TDSsensor to track concentration. This was a pretty fun project and it was the first time I was working with a pulse based water flow meter, I had to calibrate it to match the measurements I was getting in reality. I even got a good video with the oscilloscope of the pulses while the system was running. Using this to set PMs so I am back flushing and replacing filters when efficiency starts to drop.
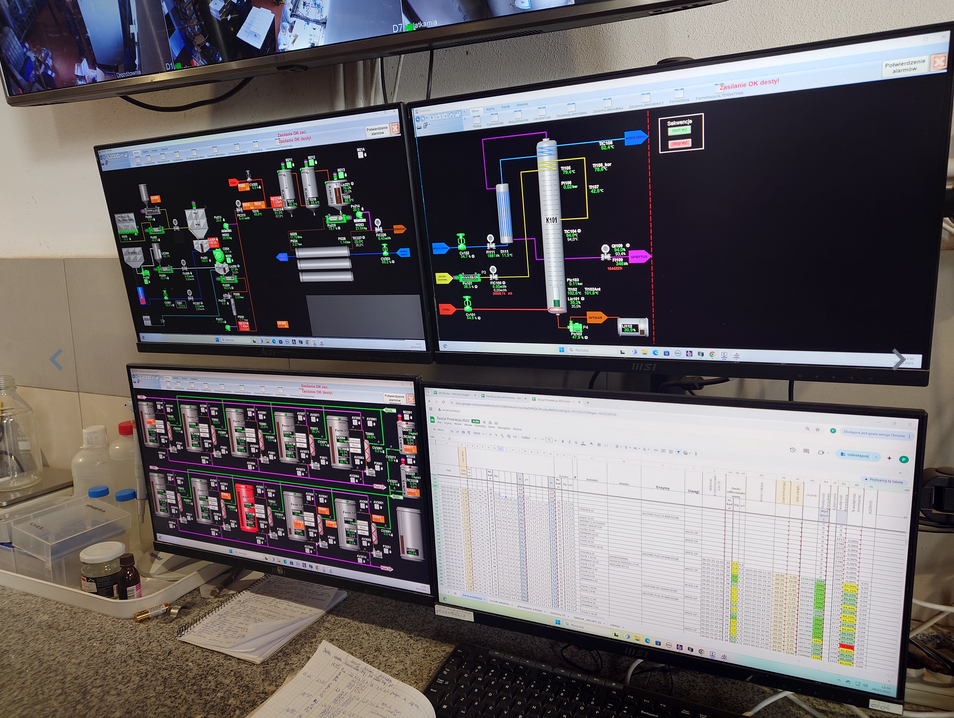
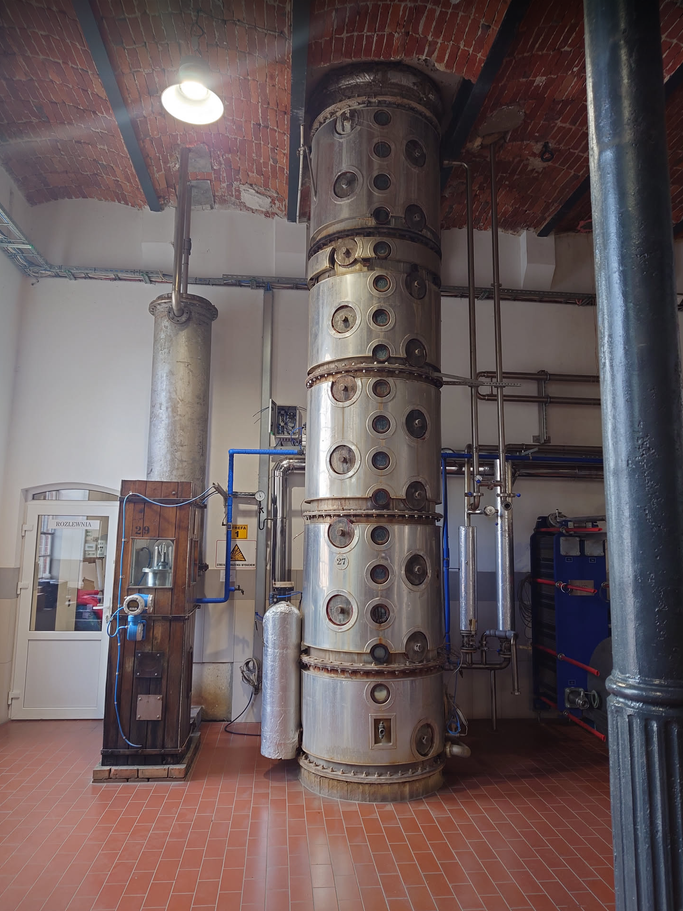
I was on a tour of one of the oldest distilleries in Poland. It was an interesting setup where they had a plate distillation column for their high volume high proof production and a copper pot still for niche product distilling. It was cool to see the “back room” where they had their SCADA system and showed me some of their operation process when they load form a new fermentation tank. We talked about their CIP processes and product changeovers, it was great to talk with the actual technical team and definitely a lot of passion for their process. They mentioned that they have a dedicated flow meter that tracks how much product is produced and all of it has to be accounted for with the government and “every drop is tracked”.
One of the ways to measure furnace efficiency/life is by measuring “temperature rise” (https://hvacrschool.com/furnace-air-temperature-rise/ ) which is effectively the temperature difference between the furnace inlet and furnace exhaust. A temperature rise too low or too high can indicate issues with the furnace and monitoring this can prevent very expensive repairs.
Rather than manually testing this every X months I decided this would be a cool project to automate and set alerts for if the temperature rise ever deteriorates. I bought a couple thermocouples and wired them up to a spare NodeMcu so that I could create a wireless data logger. One thermocouple was put into the exhaust and the other plugged into the inlet. Once implemented I was able to see a 25°c temperature rise which is inline for my furnace model. Next steps are setting up automatic alerts if the temperature difference starts trending out.
This is akin to process control where rather than run equipment to failure we find the key variables (indicators) and proactively measure them to preempt any failure. In a home settings this is relatively benign but in a large manufacturing setting, a fouled heat exchanger that is unable to raise the temperature high enough can cause millions in losses.
Thermocouples plugged into air inlet and exhaustTemperature trend between the 2 thermocouplesThis is the nodemcu with the 2 thermocouples. I used a spare PCB but since the contacts on the back are exposed I had to put this in a little plastic project box so nothing shorts.This is the trend for the temperature difference between the 2 probes.
I recently purchased a vacuum filtration setup with a Büchner funnel and a vacuum pump for ~50$ in an effort to speed up some of my kitchen filtrations. I didn’t buy any filters and opted to use coffee filters instead as a cheap alternative. Initially this equipment was a success for most fruit juices (apple and peach) but cactus juice posed a significantly large problem. Due to its viscosity and polymer like nature it took a much longer time to filter but still proved effective.
With a bit of 3D design iterations I was able to convert my manual hand cranked pasta roller into an automatic Kitchen Aid attachment. This was specifically made with Siraya Tech Blu-Tough Resin which is one of the best 3D printing resins for functional parts. I had to take a few measurements but this project ended up working quite well. One of the unforeseen challenges was once completed I was seeing some grinding between the plastics that was making it into the pasta. To solve this I took the easy way out and added some Teflon tape which was actually very effective at reducing wear.
I have been playing around with automatic aquarium feeders for close to 5 years now and have finally had a chance to make my own custom feeder designed specifically for the Fluval flex tank. It has been a fun journey where I was able to practice everything from soldering, 3D design to software development.
To Start
I started off with an off the shelf “dumb” feeder that is battery powered and has a automatic feeding function every 12 or 24 hours. This won’t do for me as I like fine grained control and batteries have a habit of failing at the worse time.
To solve this I used one of my 5$ NodeMCU controllers so I can 1) have this powered over USB, 2) set custom feeding programs and 3) to be able to control this over the internet.
For the power I simply soldered the 3V power from the NodeMCU into the automatic feeder and it worked without a problem as there was already a power conversion circuit on the feeder. As for the button that was a bit more fun.
Using a multi meter (in diode mode) I reviewed the switch contact pins that would cause the feeder to start a feeding cycle. I then soldered a transistor across these pins so that when I turn the transistor on I can simulate the physical button being pressed and start my own feed cycle. This way I still have all of the original functions of the feeder (most importantly position sensing so it returns to the correct position) but I now have full control over its use.
The last part of this was writing code for the NodeMCU controller which was a bit complex as I decided to implement the option to do multiple feed cycles and track last fed time so I can setup alerts for any feeding errors. For the multiple feed cycles I created an API for the controller that can take any number of feed cycles based on URL get parameters. For example in the URL below I have feed_cycles=1 so it would do 1 cycle but I can equivalently set this to 2 or 10. Additionally I set a hard coded password in the API so it is not accidentally accessed. This is all on an internal network that has no open access to the outside world so should not be a problem.
Now that the brains and function were all setup I set on figuring out how to actually mount it. As I have the Fluval flex aquarium that come with a lid there aren’t any standard automatic feeders that would fit so I knew I had to make my own 3D design.
I am definitely not an expert in 3D CAD design but as a certified “Jack of all trades” I know enough to get me by. I went through 5 revisions to get all of the sizing correct and in the end had a functional product. The 3 main features are a lower lip that is sized to fit in my tank’s lid, a ledge for the aquarium feeder to mount to and angled edges to ensure fish food ends in the tank.
I printed all of these on my faithful Elegoo Mars and within 3 hours had a functional product.
Summary
In summary this was a fun multi disciplinary project that allowed me to make something that doesn’t exist on the market.
Reasons why my feeder is better:
USB Powerered
Wifi Enabled
Custom Feeding Schedules
Alert Emails On Missed Feeding Schedules
Control Over How Many Feed Cycles per Feeding
Fits On The Fluval Flex
Mess Free (the flakes in the picture are there because I spilled some during the mounting process)
Home Made With Love
Additional notes: part of the reason why I went through all of this effort was due to wanting a tank with a lid on it. Living in the KW region I have very hard water and an opened tank looses to much water to evaporation leading to unseemly calcium buildup. A lidded tank reduces evaporation and enables a generally more easier life. Additionally next steps include weighing an average feeding cycle to understand the distribution and then start feeding my fish based on their weight.
I have a sunroom attached to my house which is a fantastic place in the summer except it can get exceedingly hot at peak hours with temperatures reaching up to 36°C. To combat this I installed a 300 CFM exhaust fan in the roof and added a programmable timer to turn it on at peak hours.
The installation was fairly easy though I did have to manually switch the polarity on the fan to reverse the flow. I mounted it at the ceiling so it pulls the hottest air out.
Looking at the temperature throughout the day you can clearly see where the fan turns on and drops the temperature an astonishing 6°C.
Sunroom temperature throughout the dayMounted exhaust fan
This has been a pretty fun project and is a recommended solution to managing heat in sunrooms. Next steps will be setting up a controller for this to dynamically have it turn on when temperatures are too high rather than just at static times.